Another Tour de France has finished and I’m exhausted from having watched so much entertainment packed into one month with around 3,400k cycled, 1000’s of metres climbed and every day packed with drama and excitement. Amazing athletes…counting down until next year!
Cyclists across the globe get a lot of enjoyment from watching the drama of the tour but also from keeping up with their favourite teams apparel including the kit, helmets, sunglasses and bikes; many budgets are broken when the latest and greatest are revealed during the tour.
Items of clothing, apart from the sun glasses, appear to be standard issue across the team, however a couple of years ago the fantastic kiwi climber, George Bennett broke the mould and rode into Paris wearing customised shoes which were truly amazing, check out the original article here: George Bennett Customised Shoes.
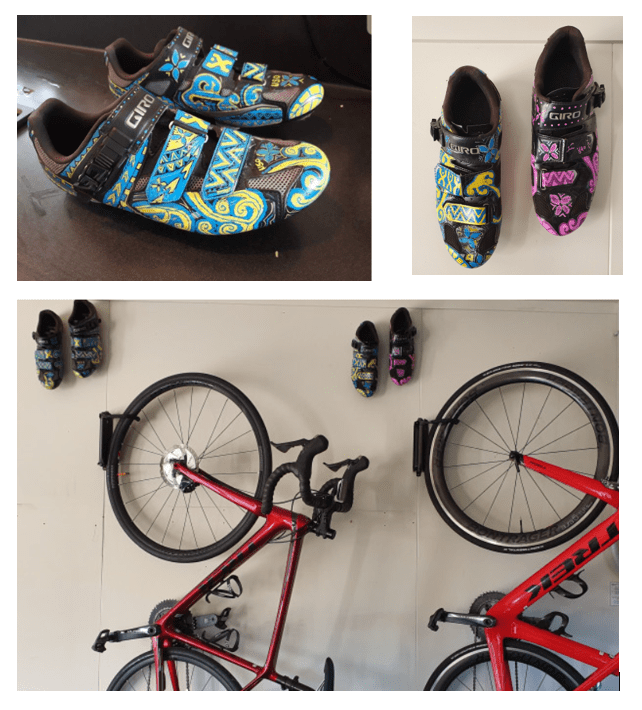
Inspired by the thought of unique shoes I decided try to customise a couple of pairs and found the process reasonably simple and very rewarding.
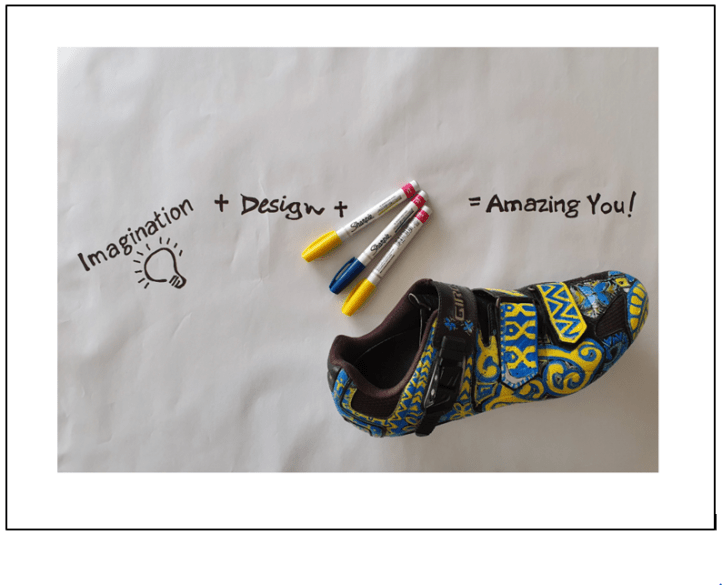
Here’s what you need:
- Pair of cycling shoes
- Imagination
- Pencils and paper to do lots of trial designs
- Oil based paint pens ( I use Sharpie Oil Based Paint Pens )
- Spray on lacquer for sealing
Step 1: Choose a design and sketch it out on paper. You can keep it simple or go crazy based on your artistic flare, patterns are a good idea if you are unsure. Your design should consider the shape and colour of the shoes you are customising.
Choose a design to reflect something you are passionate about, I included segments of the inspirational design of the USO Bike Ride kit and my take on Ironmaori triathlon; two New Zealand organisations that are transforming lives through exercise and healthy choices.
Step 2: Mark out the design on the shoe, then colour it in. The Sharpie Oil Based Paint Pens that I use come in a variety of nib sizes and lots of colour options; I use the extra fine point pen to lightly mark out the pattern before colouring in.
Follow the instructions on the pens, as it takes a bit of time before the paint starts to flow through the nib on the initial use; the recommended method involves alternatively shaking the pen and dabbing the nib on paper (be patient it will happen).
Step 3: Leave to dry between coats then repaint. I did a minimum of two coats, but this will be dependent on the colour choice and your desired affect.
Step 4: Leave to dry then spray with lacquer to seal. I used an acrylic spray can and did a couple of coats; make sure you spray them outside or in well a ventilated area and dry well between coats.
Step 5: Rock out your new customised cycle shoes on your next cycle. Enjoy the ride! You are amazing.